
Welcome to the exciting world of Curious Expedition! This is a rather difficult game, so the help this guide gives will not necessarily let you beat it, but it should hopefully keep you alive for a while. The game takes place over a series of 6 expeditions, each being larger and more difficult than the last. The goal of each expedition is to discover and explore the Golden Pyramid in each map, and hopefully bring back items to increase your fame and fortune.
Selecting an Explorer

When you first start the game, the only explorers you'll have access to are Charles Darwin, Richard Francis Burton and Marie Curie, but you'll quickly be able to unlock more as you play. Selecting your explorer is important, and depends on your play style. For specifics on individual explorers, please refer to their specific articles. Things you may want to consider when selecting an explorer:
- Perks - Most of perks is not unique to any explorer, but you can guarantee that you get a specific one at the game start. Remember that you only get 6 perks by the end of the game!
- Dice - While selecting your explorer, you're unable to see their dice. You may want to take a peek at their respective articles. Dice selection not only affects combat, but also choices and chances in numerous actions.
- Companions - A Cook or British Soldier are good if you want to do a lot of hunting, while an Animal Handler or Native Warrior would be good if you're trying to avoid such things.
- Weapons - Some explorers come with a weapon, which adds an extra die in combat. Guns are not that easy to come by in your journey, as they only have a small chance of appearing between expeditions and even smaller during them.
- Items - Other than the obvious sanity recovering items, the Camp Site, Abacus, or Binoculars are all very handy items.
Your First Expedition
The map.
Before each expedition you get to choose where you want to go. This is done on a map (to the left). You are given 2-3 choices on where to lead your expedition. There are (as of 1.2.5) five different Biome types:
- Jungle
- Desert
- Drylands
- Arctic
- Prehistoric (only available before later expeditions)
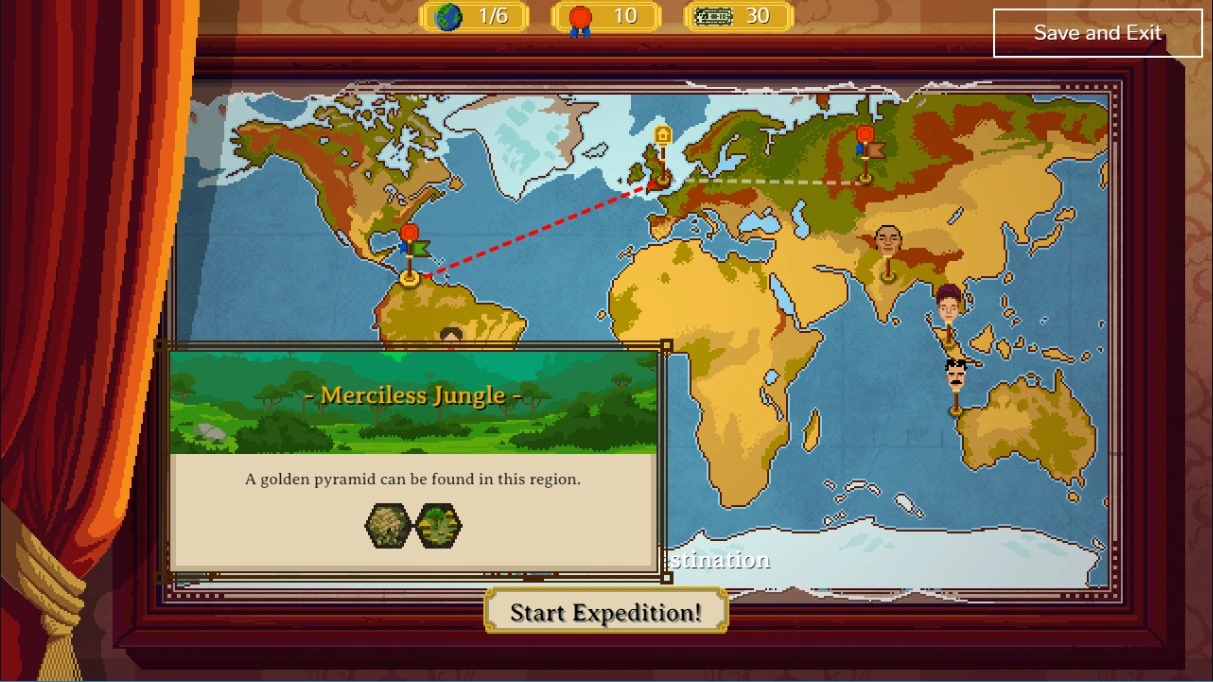
Mousing over a biome flag gives you some information about what you're going to face during your expedition. On the bottom, it shows you some points of interest that are hidden somewhere in the biome. It also tells you if the Golden Pyramid is buried or not. Buried pyramids can only be entered by either activating the Golden Seals or finding enough moonstones. When you've chosen a destination, click Start Expedition.
For each expedition, you will typically be offered a quest to do. For your first expedition, you are always given either a quest to deliver a Missionary or a letter to the local village or to escort a wife of a merchant back to London. No matter the quest, you'll gain 2 standing with the locals, who will reveal the village's Holy Temple. Accepting either quest will immediately reveal the location of the village on your map. You can refuse or fail any of these quests with no penalty, and you'd be able to keep the missionary indefinitely if you fail to deliver him!
For your first expedition, you always have at least one extra space in your party, so you might want to consider recruiting someone from the village. Usually you'll get a homesick native, but you might get lucky and get a water buffalo. They're the best basic pack animal available, and they're not homesick. Most explorers start with a donkey, so this can be an early upgrade.
Exploring the map

So, at the top of the map, you'll probably notice something that looks like this. When you hover your mouse over a region of the map, it will highlight one of those vertical bars and show you the possible locations in that region. Unexplored regions are separated on the map, which can be seen better if you zoom out (mouse wheel). Explorable regions are lighter and show the type of terrain that is there. If you hover your mouse over a region, but it doesn't show any possible locations to find, that means that the area is mostly mountains and best ignored entirely. Having the Geography perk will also show the type of locations that you haven't discovered yet, instead of a blank hex.
Revealing locations in a region not only gives you more locations to exploit explore, but it also gives you region points for each region you find every location in. Region points are used to level up your companions, so collect them when possible! View distance is very important for this. Remember that climbing hills significantly increases your view distance, so carrying some Climbing Gear or having the Climber perk can really help out, along with having a Native Scout or Binoculars with you.
Protip: You do not need to stand ON a location to explore it. You can be in any of the 6 surrounding hexes as well. Use this trick to save on sanity!

If you ever see an extra question mark on the map that isn't shown at the top, then congratulations! You have found the Golden Pyramid and are ready to go home! ... assuming you can still make it there. Edit: Old. Will rework
New info:
After a while, you might notice patterns with each point of interest (PoI) on the map. The ones I've noticed are:
Traders are surrounded by all sides of the same squares, usually plains or desert (I don't think I've seen one surrounded by forests).
Villages are usually surrounded have a shallow river and a hill and multiple mountains (these might be different from prehistoric and arctic biomes).
Missions usually have a shallow river and multiple river tiles around them.
A mountain point of interest surrounded by hills usually means a rock resting area (might be different or wrong).
An graveyard is surrounded by swamplands.
The stone circles are surrounded by a stone forest.
Shrines are surrounded by forests.
Just note that these are a general rule, and arctic and prehistoric might have some unique properties to their PoIs.
Compass

With your inventory full of goodies to take back to London, you might want to consider heading home. The compass in the upper right of your screen will show you the way to the Golden Pyramid.... sort of. If you hover your mouse over the compass, it will show you how accurate it is. You can increase the accuracy by exploring the map.
Occasionally you'll run into a shiny blue Magnetic Mountain. These will cause your compass to point towards it instead of the pyramid, so be wary!
Combat
Combat is difficult to avoid indefinitely. You can always flee, risking sanity, inventory, or even companion loss... or you can stand and fight! Hunting the local wildlife is a decent way of getting trophies to bring back home, along with supplying your Cook with raw meat to keep your sanity up. Fighting isn't necessary to win, and is probably best avoided for new players that have a hard time surviving anyway.
If you want to stay in fighting shape, it's best to carry at least one gun (Shotgun, Hunting Rifle, Pistol, Tesla Gun), and companions with the appropriate dice to use said gun. One-use weapons, such as Extra Bullets (along with the Hoarder perk) or Spears, can give you an extra bit of oomph when it's really needed. Companions with green dice are very helpful, as they can protect your party when your opponents inevitably attack. Bringing along First Aid Kits or Red Mushrooms will keep your party alive, and a Cook or British Soldier will keep you sane.
Don't forget to defend yourself! Make sure you have some method of shielding yourself in combat, otherwise you'll likely not be hunting long. A hunting rifle may do more damage, but a pistol might keep you alive for another round. Try and get a good number of green dice for your party. See the Combat page for dice combinations.
Protip: You can "save" dice between rolls. Select the dice you don't want to be rerolled just like you're making a dice combination, and then hit the reroll button. You can then click on the dice in your combination to put them back in the pool. This trick is very key to hunting parties.
Weapons
As I'm sure a lot of people want to get into combat, I'll quickly go over choosing the right gun for your party... or, more often, the right party for your gun.
Shotgun
![]()
- The first gun you'll probably use is the Shotgun. Darwin is the only explorer to start with one, but other explorers can get lucky and buy one back in London. They can be very useful for packs of enemies, such as hyenas, but can still pack a decent punch for bigger single targets. Also note that the shotgun only has three die faces instead of four.
- Quick Shot doesn't require any extra dice, and thus can be a useful last resort if you roll poorly. Try to save your shotgun die for better attacks if you can.
- The shotgun has two Multi Attacks. Shotgun Blast requires a single green die, and Aimed Shot requires two red. If you're only attacking one enemy, you should never use Aimed Shot as you can use the more powerful Point Blank for cheaper.
- The strong Point Blank attack requires a red die. Darwin doesn't start with one, but he does start with a Scottish Soldier. Other companions to consider are the Bedouin, British Soldier, Cultist, Parsi Trader, Native Scout, Native Shaman, Native Warrior, James Sterling, Hunting Dog, or Abomination.
- As the shotgun pretty much just wants red dice (and green for defense), you can try and pick an explorer with no blue dice (Richard Francis Burton, Aleister Crowley, or Alexandra David-Neel), but there's no guarantee you'd ever get a shotgun if you don't pick Charles Darwin. Then only take companions that don't get blue dice (British Soldier, Cook, Cultist, Parsi Trader, Sailor, Native Scout, Scottish Soldier, Native Warrior, Hunting Dog, or Abomination).
- Remember to use green dice to defend yourself if you don't want to die!
- With the arctic expansion update, the die only has 2 faces instead of 3. The signature version has +1 more than the regular.
Pistol
![]()
- The pistol is the starting weapon of Mary Kingsley, Johan Huizinga, Amelia Earhart, and Isabella Bird. It's a strange weapon in the sense that it is difficult to optimize for. It can increase your defense, but only as effectively as not having a pistol at all. It's a bit weaker than the other two standard guns, but it's the only one of the three that let's you increased your defense.
- The defensive attacks, Stopping Shot and Bullet Wall, are a decent way to add damage on top of your shield. If you want to lean on this attack, you'll want green dice via Animal Handler, Bedouin, British Soldier, Cook, Sailor, Native Scout, or Native Warrior.
- Unlike the hunting rifle and shotgun, the pistol does not get Quick Shot. Stable Shot can be good if you don't roll shields, and Headshot can deal decent damage.
- As the pistol pretty much just wants green dice (and probably some red dice so you can beat an enemy in under an hour), you can try and pick an explorer with no blue dice (Richard Francis Burton, Aleister Crowley, or Alexandra David-Neel), although there's no guarantee you'd find a pistol with any of them. Then only take companions that don't get blue dice (British Soldier, Cook, Cultist, Parsi Trader, Sailor, Native Scout, Scottish Soldier, Native Warrior, Hunting Dog, or Abomination).
- Try to use other attacks than just the pistol, or you'll kill very slowly
- With the arctic expansion update, the die only has 3 faces instead of 4. The signature version has +1 more than the regular.
Hunting Rifle
![]()
- The Hunting Rifle is the starting weapon of Frederick Courtney Selous and Freya Stark. It is the most powerful weapon available, but a little harder to plan around. You'll want blue dice for damage, green dice for defense, and probably some red dice to attack more than an average of twice every three rounds.
- Quick Shot is a last resort if you don't roll well. Avoid using it until the last roll.
- All the three remaining attacks require blue dice. The most powerful one, Merciful Shot, requires two blue dice. If you want to one-hit-hill panthers, you're probably going to want an Animal Handler, Artist, Bedouin, Persian Translator, Native Shaman, or James Sterling.
- Remember to use green dice to defend yourself if you don't want to die!
- With the arctic expansion update, the die only has 3 faces instead of 4. The signature version has +1 more than the regular.
Tesla Gun
![]()
- The Tesla Gun, only available to Nikola Tesla, is probably best thought of as a gimmick, rather than a weapon. It only has two die faces (worse than the Shotgun), and damages you every time you shoot! Unless you really know what you're doing, it's probably best to trade this item away. Tesla is a crack shot with the Hunting Rifle, by the way....
- Two of the attacks available require green dice. Defensive Beam, using the shield icon, will increase your defense (and hurt you). Stable Beam, using the hand icon, will deal damage to all enemies like the Shotgun (and hurt you). This makes the Tesla Gun rather versatile with green dice, as it can be fired with either face. To get the most out of this, you'd want to take an Animal Handler, Bedouin, British Soldier, Cook, Sailor, Native Scout, or Native Warrior.
- The third attack, Alternating Beam, is the second most powerful attack in the game, behind the hunting rifle's Merciful Shot (but only slightly better than the pistol's Headshot). It uses two blue dice, which Tesla already comes with (and upgraded too!). You're far more likely to not roll a gun symbol than you are to not roll both blue faces, so you probably don't need to focus on getting more blue.
- Because of the fact that the gun harms you, it's probably not best to use a lot in combat. But if you're not using it in combat a lot, it's taking up inventory space.
- Fun, but dangerous and unreliable.
Extra Bullets
![]()
- Extra Bullets need to be expended in battle to give you an extra die. Up to three dice can be added this way. A few explorers start with some, but more can be obtained by buying them in London, or getting the Bullet Hoarder perk. As they are expended when used, they're probably not best to rely on, but can definitely give you the upper hand in a pinch.
- The best use for sword symbols are the various Riposte maneuvers. Because of this, extra bullets really shine when combined with green dice.
- Because the die is all swords, they can be used as a normal red die (as long as you need the sword icon)
Spear
![]()
- Spears can be obtained by trading for them in villages, or looted from the bodies of natives you've
murdereddefended against. - Probably one of their most useful attacks is Spear Defense, which is in combination with a green die.
- Spear Attack and Spear Throw both do the same amount of damage, needing a red and blue die respectively.
- If you combine a red and blue die, you can use Power Spear, which is the third strongest attack in the game, behind the Hunting Rifle's Headshot, and the Tesla Gun's Alternating Beam.
Pacifism

So you want to avoid fighting? Well, here are some things you might want to consider:
- Bardic Knowledge - The Native Warrior has stealth, which will reduce the aggro chance of enemies. This means those wild beasties are less likely to come after you. You can also expend a Horn Flute to cause the creature to fall asleep, letting you slip by unnoticed. Try to avoid banging your bongos around the local wildlife, though...
- Donkey Master - If you don't need any dice, there's nothing stopping you from taking a lot of animals, and increasing their cargo with the Animal Handler. The more cargo space you have, the more trophies you can bring home.
- Missionary Position - Missionaries are typically pretty bad for a hunting party as their dice don't upgrade. Plus, hunters have an easier time living off the land, and thus don't need the increased maximum sanity. Not only do you not care about the negative, but you'll be needing the extra sanity for your longer trips.
- Art School - Without your inventory being stuffed with dead animals, there's more room for your Artist to store his paintings. Just remember to upgrade him before you paint!
- Elf Eyes - Load your Native Scout up with Binoculars and Climbing Gear, and your Sailor with Coston Flares. The further you can see, the less you need to travel, and the less you need to travel, the less you'll go insane.
- Population Pal - Taking a Parsi Trader (or James Sterling) and a Persian Translator can get you the most out of the native people. A high level barter skill can get you free items at every location.
- Boy Scout - Be prepared! Bring a Camp Site and lots of food. I think I saw the natives leaving some fresh Mangos by that funny looking statue over there...
- Gun Running - Just because that explorer has a gun, that doesn't mean they have to be violent. Guns are expensive, and you can get a lot of goodies from the natives if you trade it away.
Sanity

Sanity isn't so much a "sanity" meter, as it is sort of a combination of your party's supplies and morale. Traveling at 0 sanity is very dangerous, and can result in your party members dying, running away, disappearing, eating each other, etc. If you are the only one left in your party, traveling at 0 sanity could mean your death, although the Lone Survivor perk will prolong that somewhat.
The most reliable way to restore your sanity is through Chocolate Rations. While not the most abundant or powerful, there are no negatives to it. Mangos are also good with no negative effects from eating, but will decay and disappear from your inventory after a few days, and can't be taken between expeditions. Cooked meat is also a good choice, but it requires you kill the local wildlife, and a Cook (preferably high level). Whiskey will restore more sanity than chocolate or mango, but has a chance to make one of your party members an alcoholic (which isn't the worst ailment to have). Coca Leaves, on the other hand, should be a last resort, as they have a high chance of making your party members go insane, albeit the less harmful ways of coming to suffer on an expedition. Drums can be used to restore your sanity by a little bit, but will make you more likely to be attacked by wildlife for a period of time.
Another way of regaining sanity is to rest. You can rest at a village, but will cost you some standing with the locals. If your standing is low, you'll have to barter to stay the night. If it's low enough, the natives will even refuse. Missions are similar in that you barter to rest there, but having a Missionary lets you rest for free. There are a few locations that let you rest out in the open, and the Camp Site item can be expended to create a permanent resting site on the map. Resting takes time, and can often lead to random events, depending on your location.
Protip: Sanity is key! Don't be afraid of wasting a lot of time by resting outside. It's better to come home with little fame than to not come home at all! Also use sanity recovering items only when needed (with the exception of mangos). You don't want to chug a bunch of whiskey, only to realize that the pyramid is right around the corner.
Looting

Sooner or later (probably sooner), you will have to loot some items. If you loot a Shrine or Stone Statue, you will annoy the natives, while looting an abandoned camp site, Elephant Graveyard, or Tomb will not incur the wrath of the aborigines (although they won't appreciate you bringing mummies into their village). If you're rude brave enough to loot a Shrine, something bad will happen depending on the omen you see when you first arrive (pay attention to the word highlighted in red).
During expeditions 4-6, Moon Stones will start to appear at Shrines and Tombs. These are very important, as they are required to explore the Golden Pyramid on those expeditions. You can sometimes be lucky and bring extras home, but it's highly recommended that you DON'T sell or donate them! Later shrines will require Rope or Climbing Gear to access, so make sure to always carry some with you on later journeys.
Another possibility is that there will be a number of Golden Seals that you need to activate in order to unearth the Golden Pyramid. The Golden Seals can be found scattered around the map.
Protip: If you find yourself needing a Moon Stone, the only places left you haven't looted require rope to access, and you're fresh out of supplies, you can try resting outside while having a Persian Translator or the Polyglot perk until natives arrive to trade with you, hoping they have rope. If you have no way of communicating with the natives, might I suggest suicide?
Other than hunting, looting will probably be one of your main methods of bringing trophies home to donate or sell, so don't be too bashful. The natives just leave this stuff lying around places.... "Waste not, want not," correct?
Also, if you have a lot of treasures and are either in the arctic or at a mission, you can store up to 3 treasures and it will automatically go back to London! Be careful accessing shrines that can destroy the mission though (like the void), because it will also destroy the loot inside.
Returning Home
Returning to London can be very relieving. You gain a new perk, you regain your sanity, and you can sell and donate your trophies. After you've rested up, you're rewarded for your previous quest (don't forget to keep an instrument if you have that quest!), given a new quest, shown a new companion to recruit (two with the Charismatic perk), given the chance to purchase items with your funds (extra items to chose from with the Black Market perk), and sent on your way.
Protip: Pay attention to what you're bringing home. That beginner's painting isn't as valuable as that Golden Mask. Likewise, you might want to go for more items to increase your funds in the first couple expeditions, and concentrate on fame items later on. Remember that a gun or binoculars might be for sale early on.
Fame

So not only do you have to survive all 6 expeditions, but you also have to be the most famous explorer too! There are a few ways to gain fame:
- Butterflies - While walking around, you might encounter some butterflies on your journey. Each butterfly you find will slightly increase your fame. Bringing a Butterfly Net with you will increase your chances of finding them, this increasing your overall fame.
- Days Spent - This isn't so much a way to earn fame, but a way to lose it. Each day you spend on your expedition will reduce the total fame of that expedition by 10. Thus, you are encouraged to complete each expedition as expediently as possible.... just don't be reckless.
- Donating - When you bring trophies back to London, you have the option of auctioning them off for funds (your only source of income), donating them to the museum, or keeping them for your next expedition. Some items will get you more fame than fortune, and vice versa.
Protip: Ignore fame completely when you're first starting out. If you don't survive, all that fame you worked for did you no good! It's probably best to sell all your trophies until you get better at the game, and start each expedition with plenty of supplies.